
Introduction
Let’s see how to use and deploy Jenkins CI flow for Android apps. Specifically, setting up automated unit testing and building projects step-by-step.
Diving into development for Android OS, you’ll probably hear about a thing called unit testing. In fact, development for any platform has a thing for unit testing. And that’s because of a reason.
READ ME: All examples are on Android Studio, Android SDK and Linux (so if you’re not into these, some examples may be hard to follow. Or not ;) We also covered CI server on Mac OS for iOS using GitLab and Fastlane for iOS devs.
1. Why care about unit testing?
Unit testing is definitely a great thing to introduce to your project, because you can make sure that:
- New modules don’t affect the existing unit-tested parts of the project.
- A specific code part works as we expect it to.
In case they don’t, failed tests immediately show you where the problem is.
Unit tests are executed on a virtual Java machine, and of course you can run them directly in Android Studio. However, if your team is more than just you, using a continuous integration tool that automatically launches unit tests and generates informative report is a better idea.
You can then export this file as .apk and share via email with your QAs, for example. And here’s a solution for such purposes: Jenkins CI server https://jenkins.io/
2. How to Install for Jenkins CI Server
So, to install Jenkins:
- Download the latest stable version at http://mirrors.jenkins.io/war-stable/latest/jenkins.war
- Open up a terminal and go to the download folder (or a folder to where you moved the jenkins.var file) with a command:
$ cd home/anyfolder/Downloads/ - Run a command:
$ java -jar jenkins.war --httpPort=8080
This will launch a script that’ll create a hidden .Jenkins subfolder in the home folder. All server configurations will be stored in that subfolder. The server will run as long as the terminal with script is open.
To stop the server, either close the terminal window, or press Ctrl + C.
3. Setting Jenkins Server Up
After you run the script, the building of a local Jenkins server starts (using 8080 port).
On the Getting Started screen at http://localhost:8080/, you’ll need to enter
Initial Administrator Password. For this purpose, copy the provided path to your clipboard.
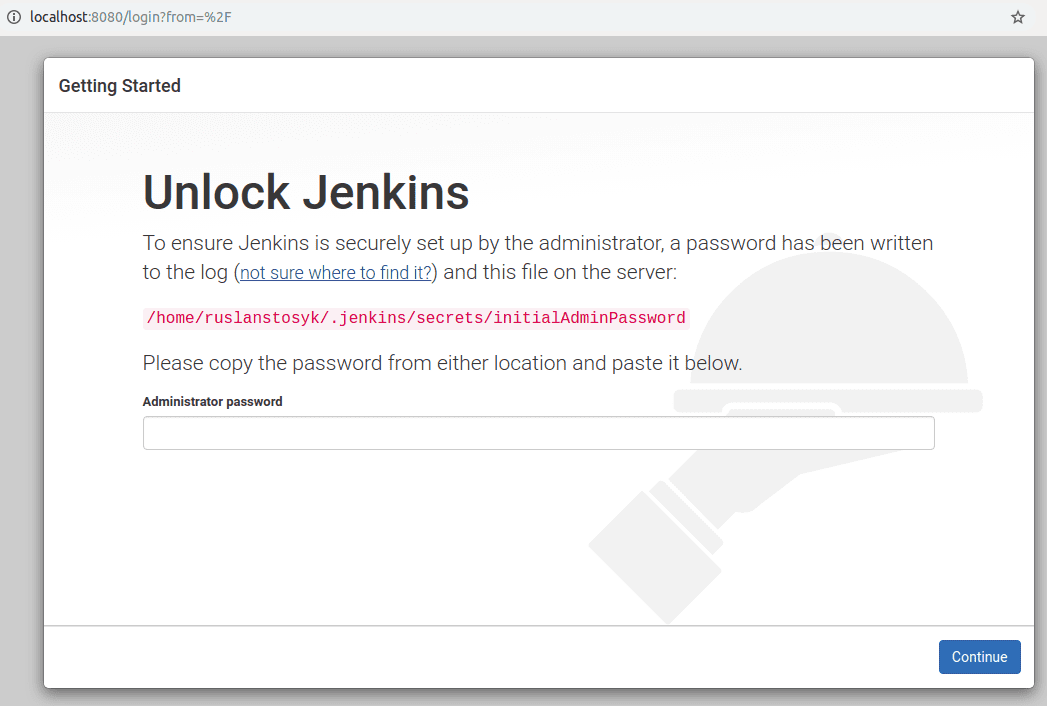
Therefore, to locate this password:
- Launch a separate terminal instance and paste that path. For example:
$ cd /home/ruslanstosyk/.jenkins/secrets
This will open the secrets folder. - Use the cat command that allows reading content of a specific file. In this case, run cat command with initialAdminPassword filename:
$ cat initialAdminPassword
This will display your password on the console. - Copy and paste the password to the Administrator Password field and then click Continue.
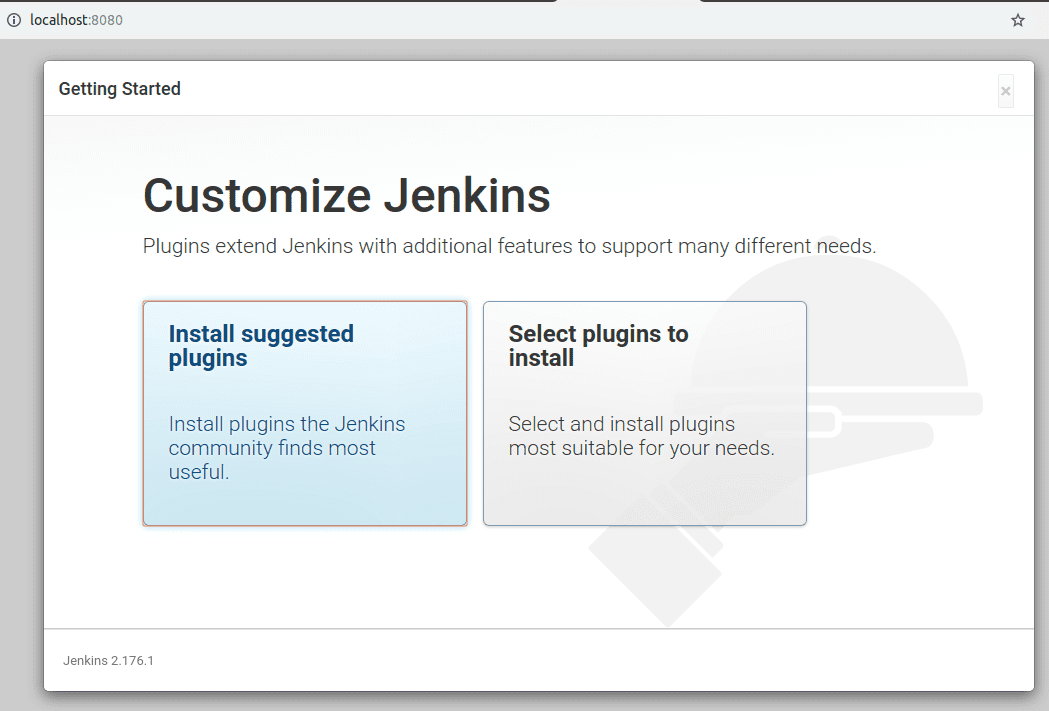
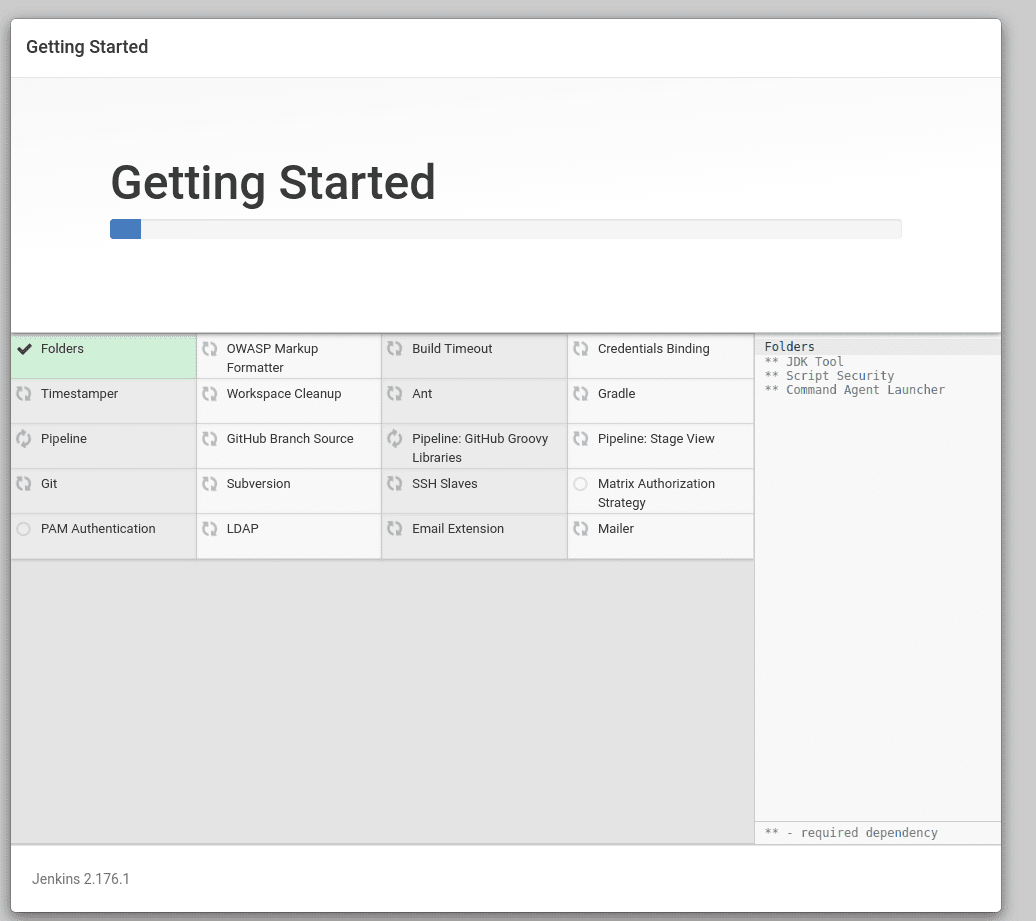
- At the next step, select Install suggested plugins.

After you familiarise with Jenkins or require some specific tools only, you may use Select plugins to install. However, at first and for basic needs, Install suggested plugins option is better. - Wait a few minutes while the installation is in progress.
-
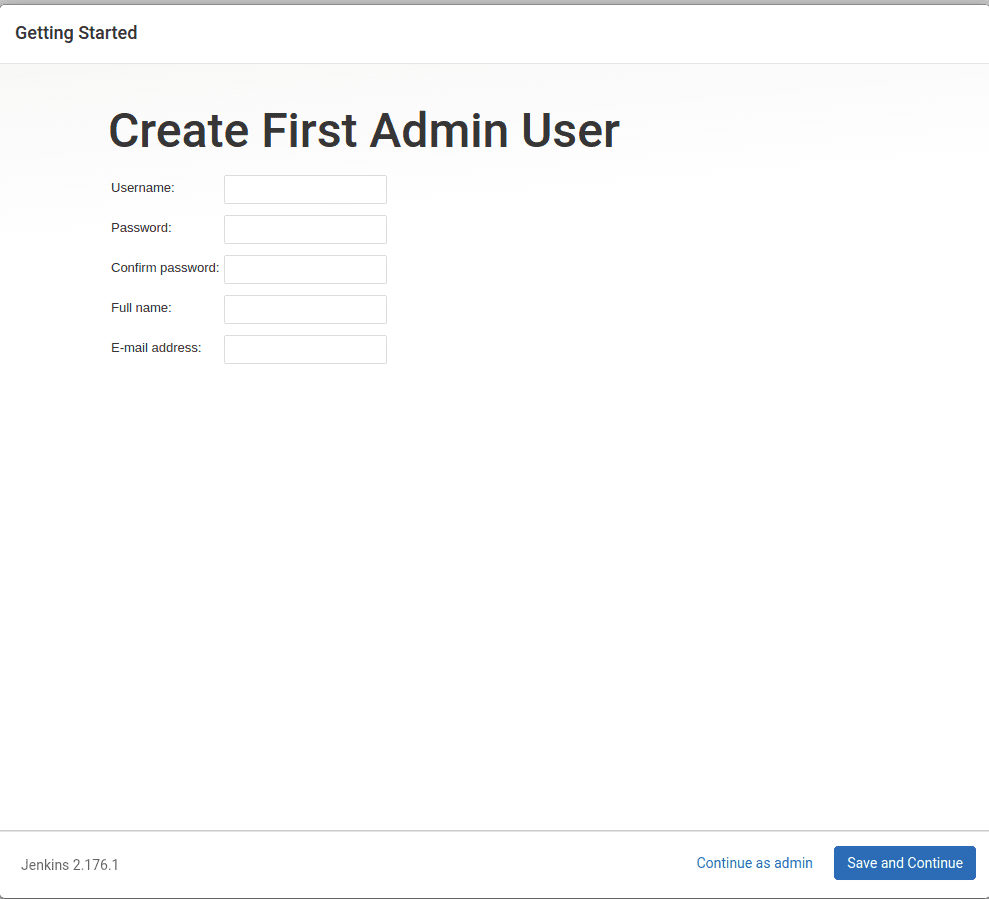
Create a user for signing into the system and configuring the server and click Save and Continue.
-
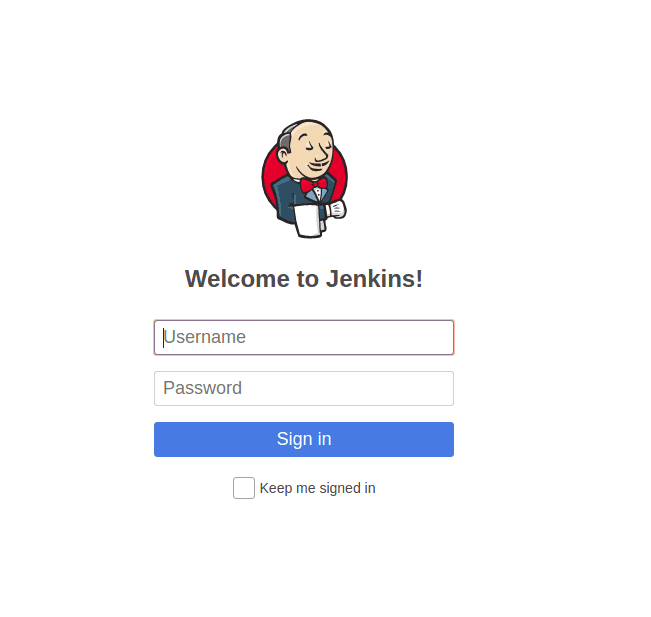
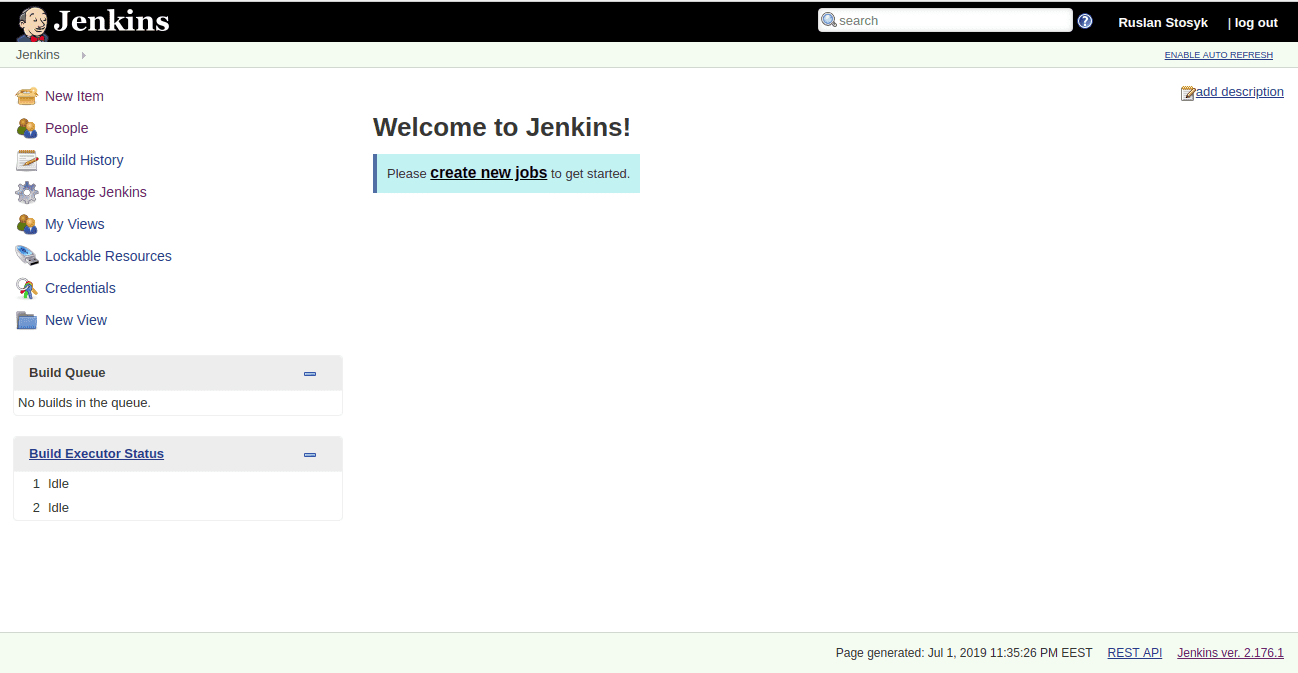
Sign in to Jenkins using your username and password.
4. Configuring Jenkins integration for your needs
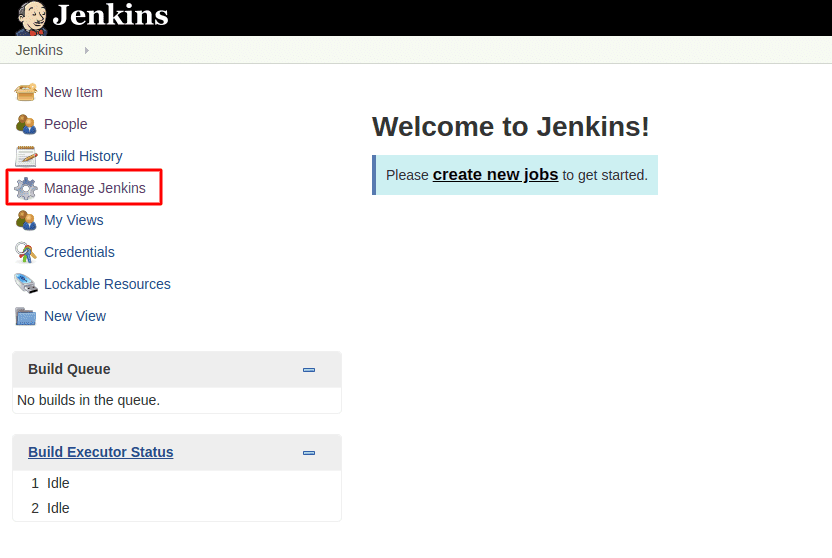
So, after you’re all set up with the server inself, you’ll need to arm it with plugins that bring most benefits of continuous integration for building Android apps. First, from the start screen, select Manage Jenkins.
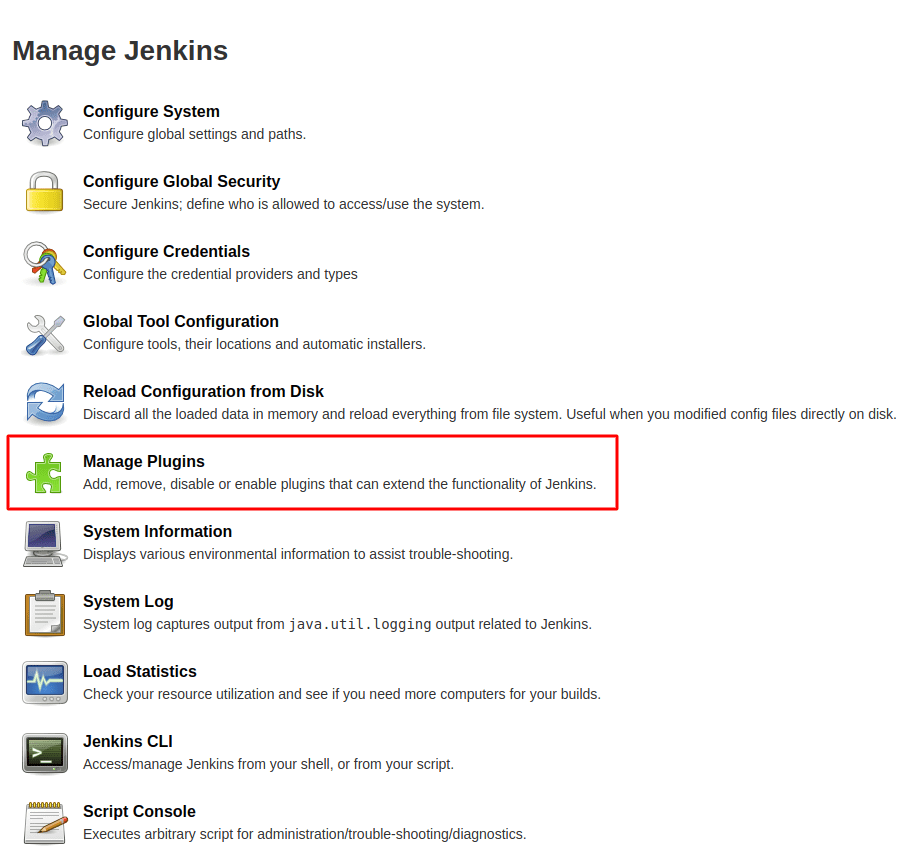
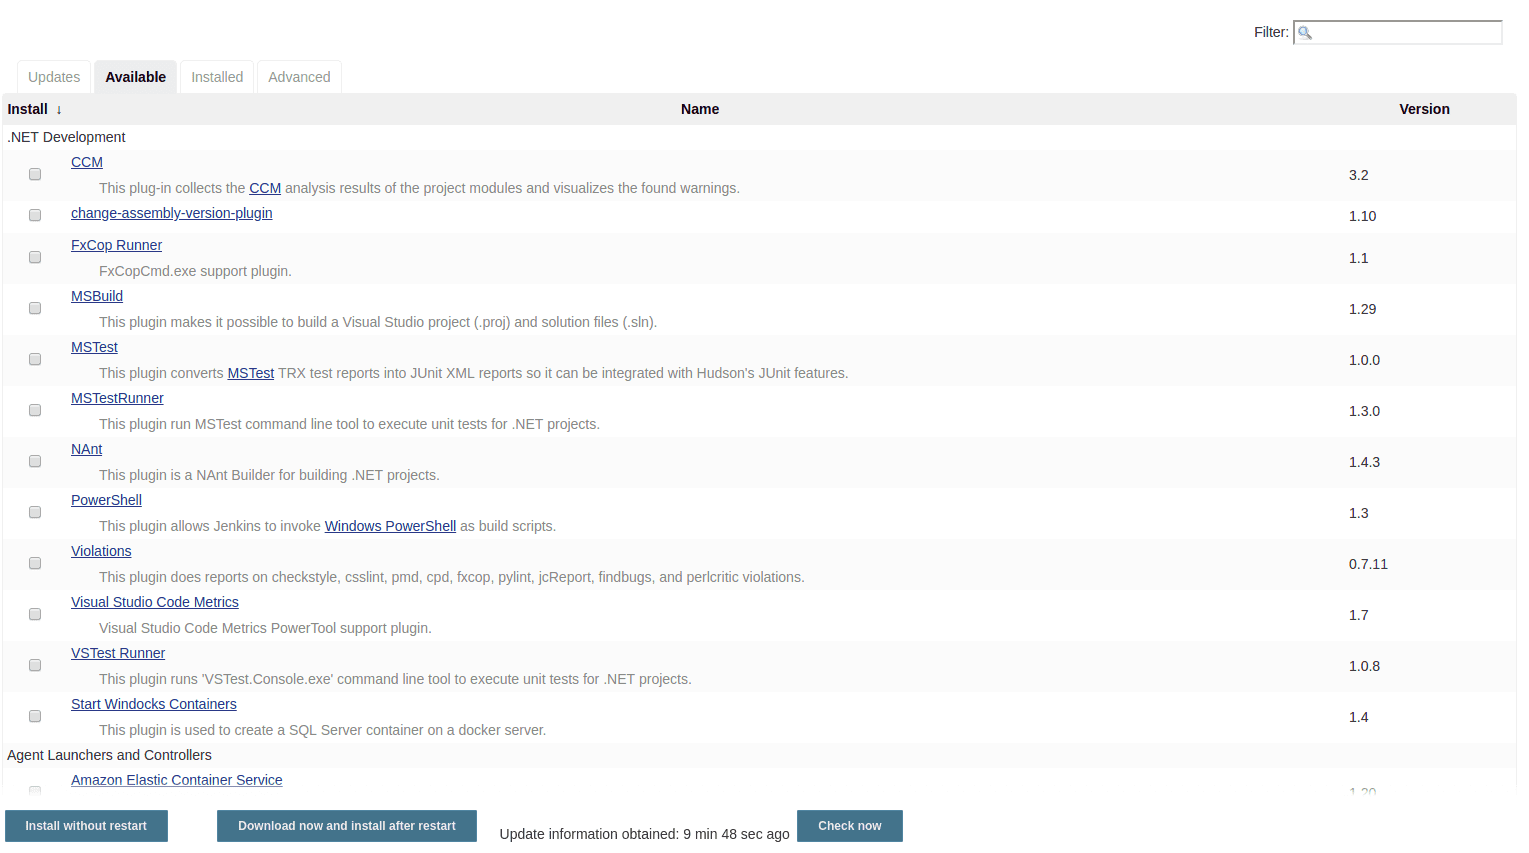
From the menu that appears, select Manage Plugins to go to the plugin management page. Here you can add, update, and select plugins you need. We’ll add plugins to customize the Jenkins deployment and adjust it to the required types of tasks.
Go to the available inset and find and download the following plugins (or use the links):
- JUnit
https://wiki.jenkins.io/display/JENKINS/JUnit+Plugin - JaCoCo
https://wiki.jenkins.io/display/JENKINS/JaCoCo+Plugin - EnvInject
https://wiki.jenkins.io/display/JENKINS/EnvInject+Plugin - GitLab Plugin
https://wiki.jenkins.io/display/JENKINS/GitLab+Plugin
After you install all plugins you need and to properly launch them, restart Jenkins tool.
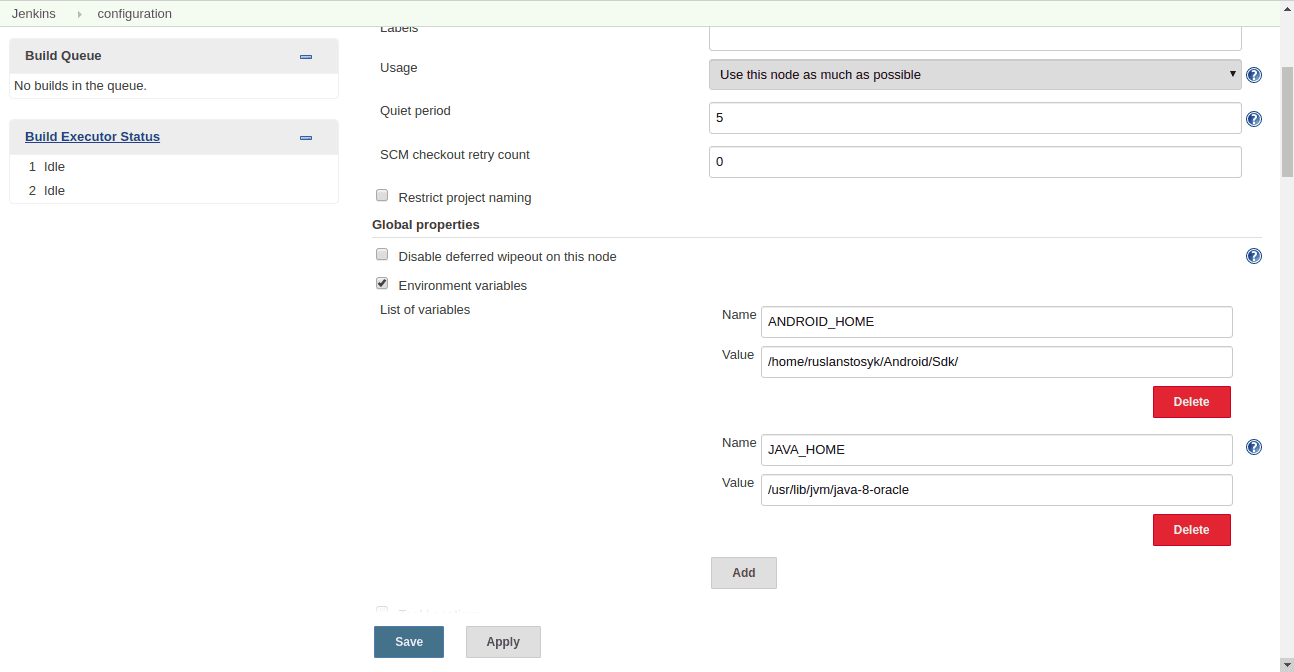
Set up the path to folders that contain Java and Android SDK:
- From the start page, to to Manage Jenkins, and select Configure System option.
- Scroll down to the Global Properties and select the Environment Variables checkbox.
- In the Name field, paste JAVA_HOME and specify the path to you Java folder in the Value field.
- Click Add.
- In the name-value pair that appears, paste ANDROID_HOME as Name and specify the path to your Android folder in the Value field.
- Click Save.
5. Creating a Jenkins CI project for Android
So, finally, we’re all set up for creating a new project.
5.1 Bind Jenkins to your project on Git
-
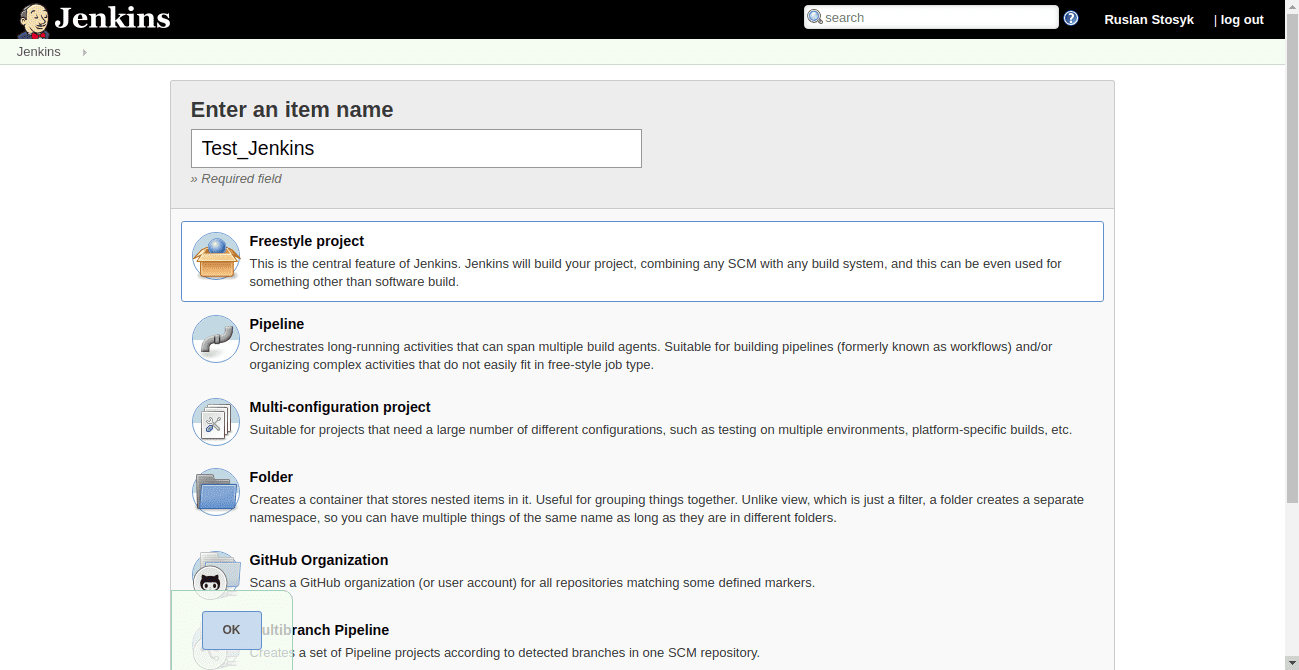
On the start page click New Item.
-
Assign a name for your project. This name must not contain spaces.
For example, testproject, test-project, Test_Project.
-
Select Freestyle project option.
This will launch the project configuration page. -
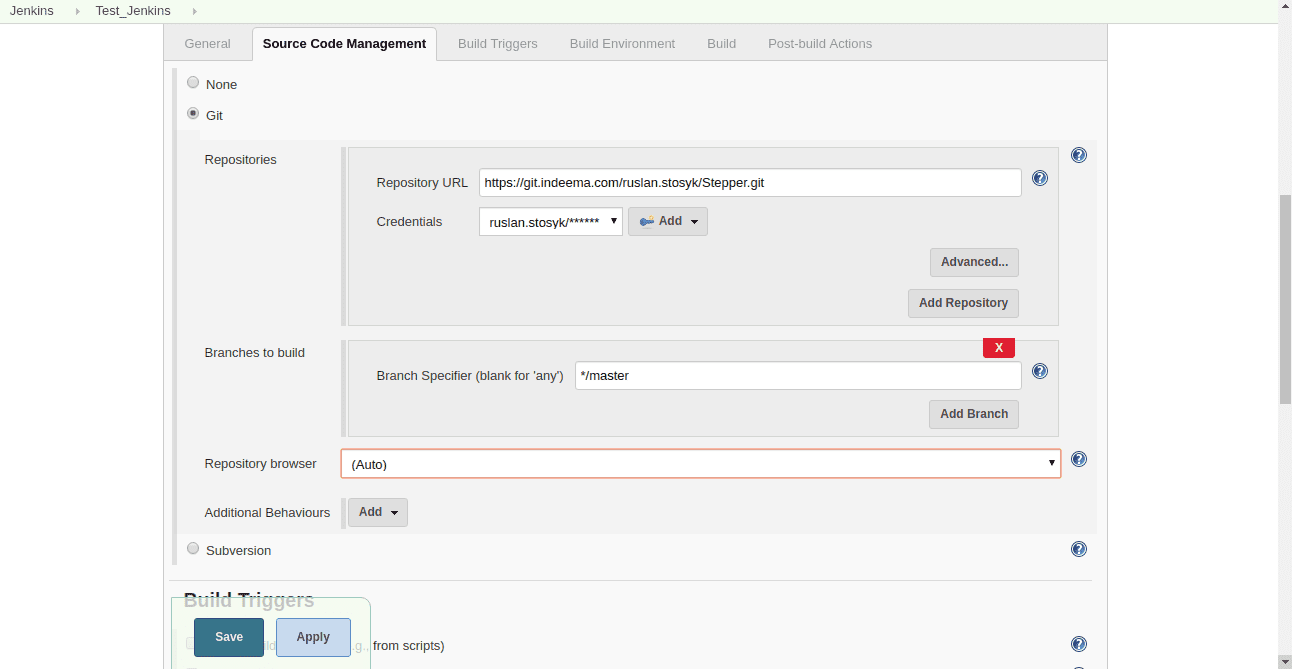
Go to Source Code Management.
-
Select Git checkbox and paste full path to your project.
-
Enter your credentials to let Jenkins clone and launch your project.

5.2 Add rules for building the project
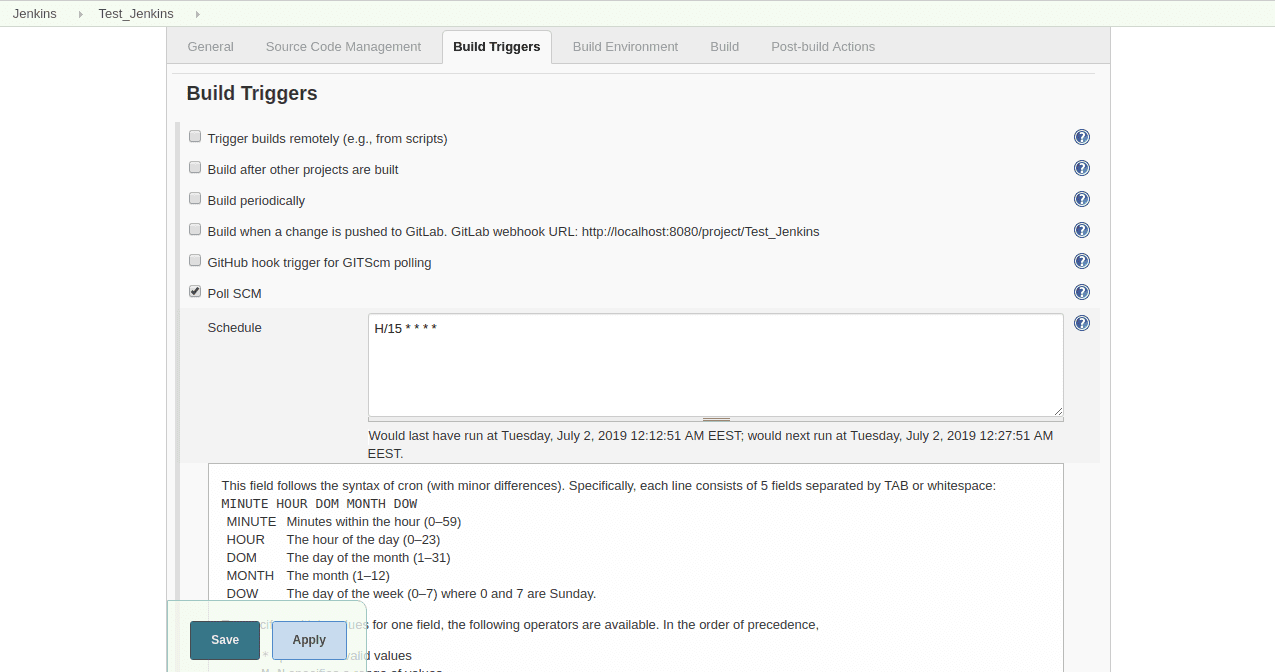
Next tab we’ll need for Jenkins continuous deployment is Build Triggers. Here we can add rules for launching the project’s build. There’s a variety of options we can set up for starting the build. For example, detecting a specific keyphrase in a commit name such as [ci start] or any other you set up. Yet, to make use of this functionality, you’ll have to deploy Jenkins CI on a web server (instead of a local one), because it’s implemented using web hooks.
In our case, we used an option that starts build every 15 minutes. This option uses cron syntax.
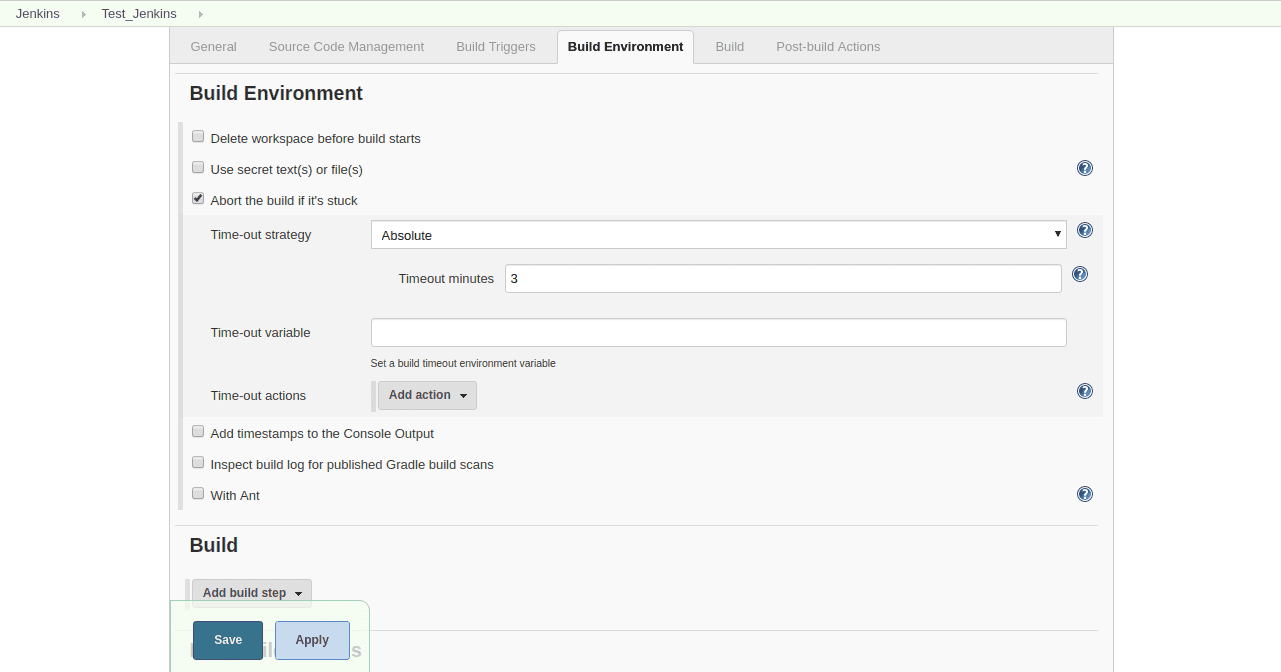
In the Build Environment tab, select Abort the build if it's stuck checkbox. This option is quite handy for cases when an unexpected error occurs and you need to free queue and deallocate memory.
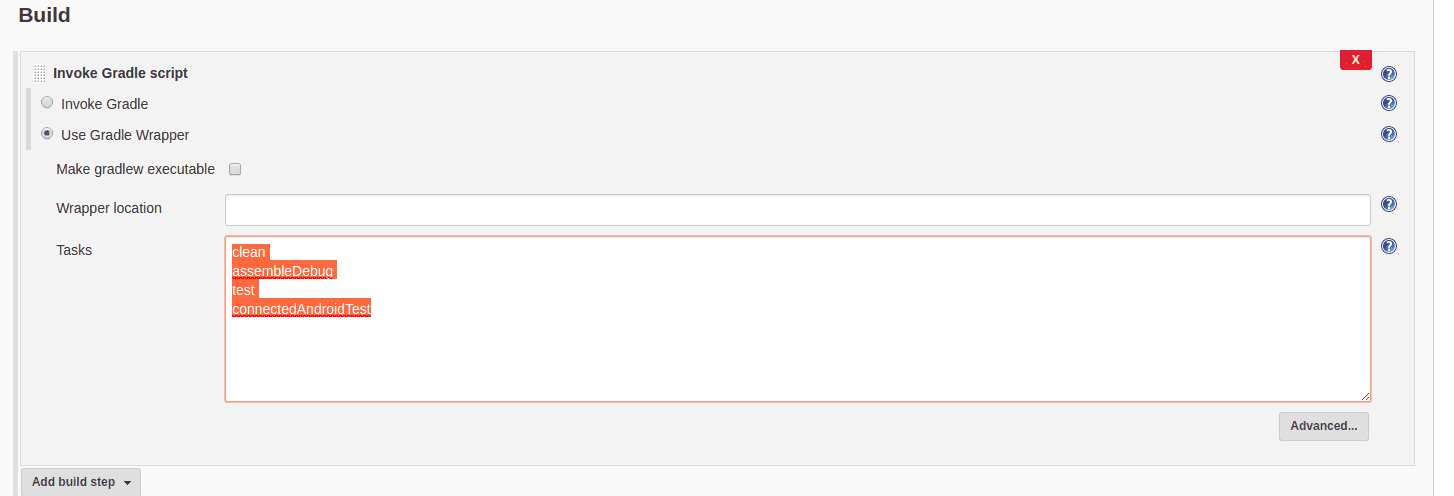
So, in the Build tab, you have to specify the options to run:
-
From the drop-down menu, select the Invoke Gradle Script option.
-
In the Invoke Gradle Script dialog, select Use Gradle Wrapper checkbox.
-
Fill the Tasks field with the script that defines the order for running the commands.
We used:
clean
assembleDebug
test

connectedAndroidTest -
Then configure Post-Build Actions by selecting the following options from the drop-down:
-
Publish JUnit test result report
Using this option, you’ll configure Jenkins to save the detailed report on each test run. You’ll also get a nice visualization of the report.

-
Archive the artifacts
This option builds the project after all tests are run. So you’ll get an .apk file ready to be downloaded and installed on a device.

5. Click Save.
To launch the project, either run an emulator, or connect some Android device to your computer and then click Build Now.
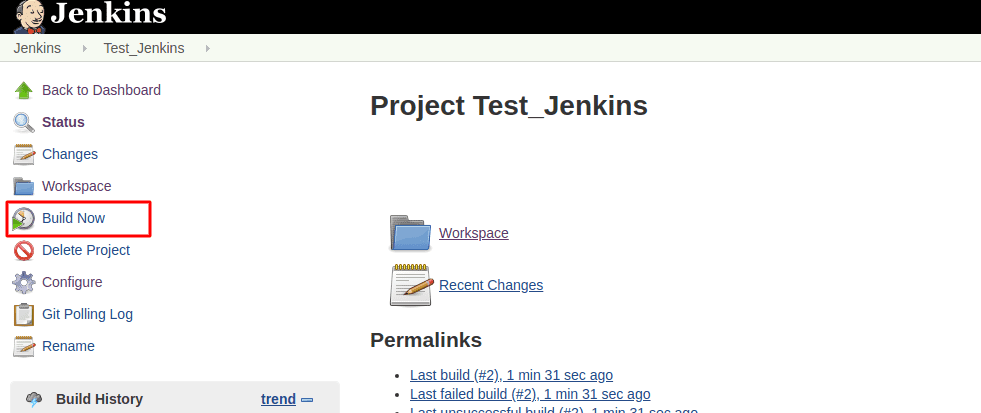
While the project is being cloned from the repo and the build is starting, you can explore the build status and info about success/failure of each stage in the Console Output.
5.3 Review the build
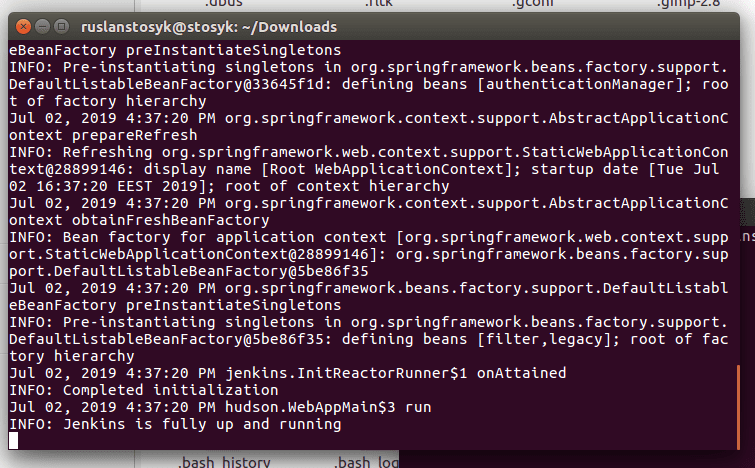
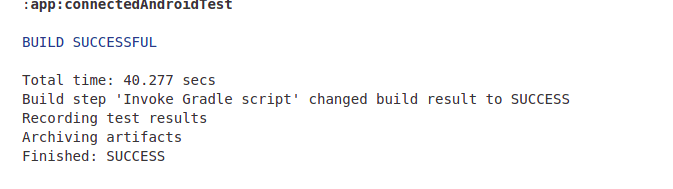
After the project is successfully built, you’ll see the following logs in the Console Output:
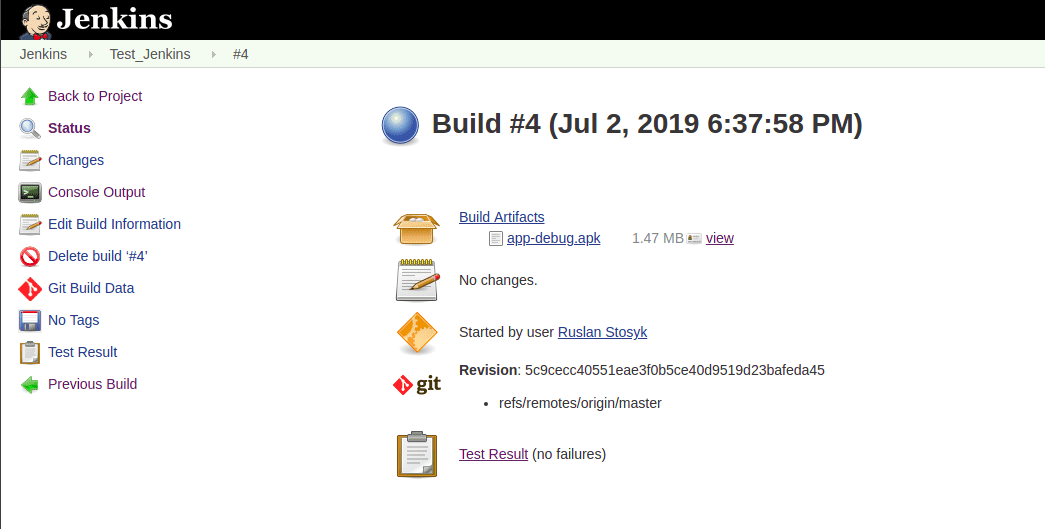
From the main page of the build, you can download the .apk file and build logs, review the information about running the tests (success and failures), and more.
Conclusion
So we’ve made quite a lot of configurations. As a result, we’ve got a continuous integration using Jenkins for automating a part of build creation and launching tests when developing an Android app.
This article covers only the tip of the iceberg of what you can set up and customize via Jenkins CI for your project/requirements.
Thanks for reading and hope it helps you automate mundane tasks ;) Subscribe for more nifty stuff about continuous integration tools, IoT, Android development, and more!

